Guys/gals,
My HL is due for an oil change and I would like to know if I can accomplish this task without lifting it. Does anyone have a DIY tutorial with pictures that I can follow?
Thanks in advance,
G
Reply 1 : DIY Oil Change ... anyone has a tutorial with pics?
Sorry man , no pics...but I can assure you , I do it all the time and its the easiest vehicle I have personaly ever done....may want to drop the skid plate plastic in the front bottom , but the filter can be removed by hand and the drain nut is bulla easy to get to.....and no need to lift vehicle.....use drop cloths though , once the main flow of oil slows down it drips on frame work and drips elsewhere and makes a mess.....
05 4cyl HL
PS: if you got a tight oil filter you cant remove by hand , don't buy a oil filter tool , hammer a long screwdriver all the way through the filter and walla , you got a handle......crank and remove
Reply 2 : DIY Oil Change ... anyone has a tutorial with pics?
Thanks for the reply ... but I see that you have a 4cyl and I have a 6cyl. I know the filter location is somewhat different. I'm gonna try to do it anyways.
Reply 3 : DIY Oil Change ... anyone has a tutorial with pics?
Quote:
|
Originally Posted by G Dal 
Thanks for the reply ... but I see that you have a 4cyl and I have a 6cyl. I know the filter location is somewhat different. I'm gonna try to do it anyways.
|

Reply 4 : DIY Oil Change ... anyone has a tutorial with pics?
If you've ever changed the oil on any vehicle, the HL is not much different. I don't have a write-up but here's my cheat sheet I keep on the PC:
Highlander Oil Change
(3MZFE & 1MZFE V6 Engines)
Tools
- 10mm socket (cordless driver helps) to remove undercarriage cover bolts (8 bolts)
- Small flat head screwdriver to remove undercarriage cover plugs (2)
- 14mm socket or wrench to remove oil drain plug
- Oil filter pliers to help remove oil filter
Misc
- Ramps
- Oil Pan
- Funnel (lg to pour oil)
- Funnel (sm to help drain filter oil)
- Paper towels or rags
- Rubber gloves
- Sharpie (record mileage on filter)
Oil & Filter
- 5 quarts of 5W-30 synthetic
- NAPA Gold 1348, Purolator L10241/PL10241 or Toyota 08922-02011 filter
Torque Specs
- Oil drain plug: 33 ft-lb
- Oil filter: 13 ft-lb or turn after gasket contacts seat
Reply 5 : DIY Oil Change ... anyone has a tutorial with pics?
Sorry to resurrect an old thread.
But today I did my first oil change on the 1MZ-FE (V6) 2001. I did take some pics. It was quite easy, albeit not as easy as on my Tacoma.
I was wondering.. I could create a short write up, if anyone would like. I know this (oil change) isn't hard to do, but there may be some who have always paid others to do it, but might want to take the plunge to wrenching, and DIY oil changes are a nice easy introduction. If you are like me, pics make explanations easier.
So, let me know guys & gals, if you want me to take the time & create a write-up. I won't be offended if no one does.
cheers
D
Reply 6 : DIY Oil Change ... anyone has a tutorial with pics?
Quote:
|
Originally Posted by Dante's Taco
So, let me know guys & gals, if you want me to take the time & create a write-up. I won't be offended if no one does.
cheers D |
Reply 7 : DIY Oil Change ... anyone has a tutorial with pics?
If it is not too much trouble for you,. it would be a good contribution to the diy sticky that might help folks wanting to do their own oil. Its very satisfying.
Reply 8 : DIY Oil Change ... anyone has a tutorial with pics?
Here is a short write up on changing your own oil, with a few pictures. It is definately aimed at the first timer, so you veterans, please proof read for accuracy.
Some safety points first when working under a vehicle:
- ALWAYS make sure vehicle is either level, or if on ramps, will not roll towards you if something fails with brakes or wheel chocks
- engage E-brake
- chock at least 2 wheels to prevent rolling
- wear rubber gloves - motor oil is linked to cancers
here is the supply list copied from Peace:
Tools
- 10mm socket (cordless driver helps) to remove undercarriage cover bolts (8 bolts) - I only have a simple ratchet.
- Small flat head screwdriver to remove undercarriage cover plugs (2) (I found I didn't have to remove them, but did use the screwdriver to gently pry them wider, and the cowl slid out)
- 14mm socket or wrench to remove
- Oil filter pliers to help remove oil filter
- personally, I also have a torque wrench & 14 mm socket to tighter drain plug (optional)
Misc
- Ramps (see my blocks)
- Oil Pan
- Funnel (lg to pour oil)
- Funnel (sm to help drain filter oil) - or small plastic container
- Paper towels or rags
- Rubber gloves
- Sharpie (record mileage on filter)
- Wheel chocks
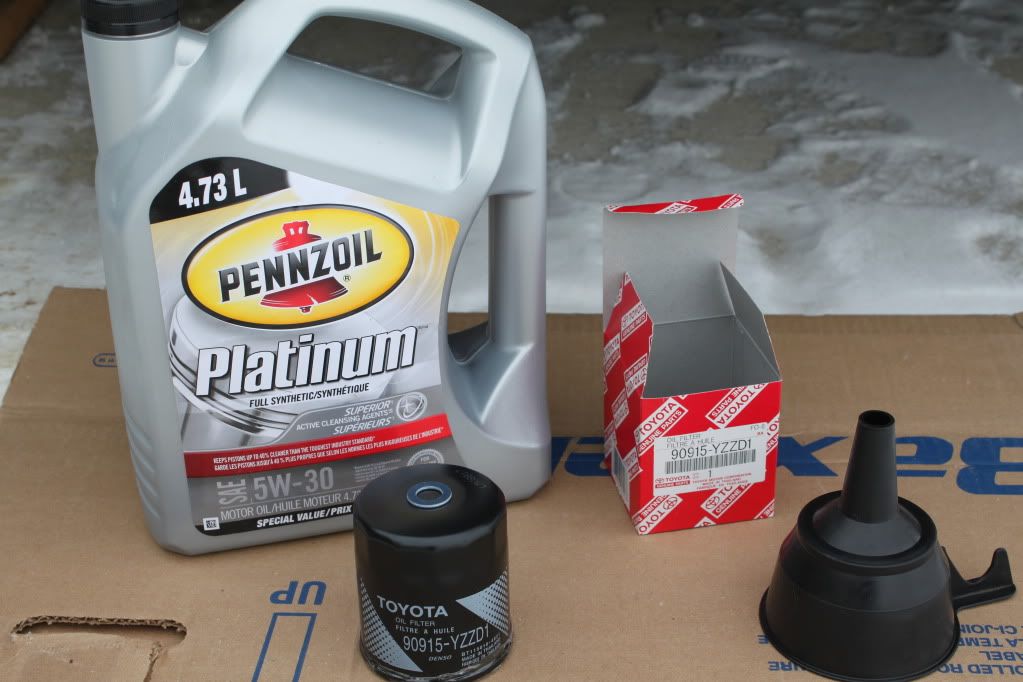
You will need about 4.73 litres of 5W30 oil (brand of your choice) and an oil filter (OEM 90915-YZZD1 or NAPA Gold 1348, L10241/PL10241 or Toyota 08922-02011 filter) The dealership calls them 'D1s. I also picked up another drain plug washer for $1 - you can see it on top of the filter:
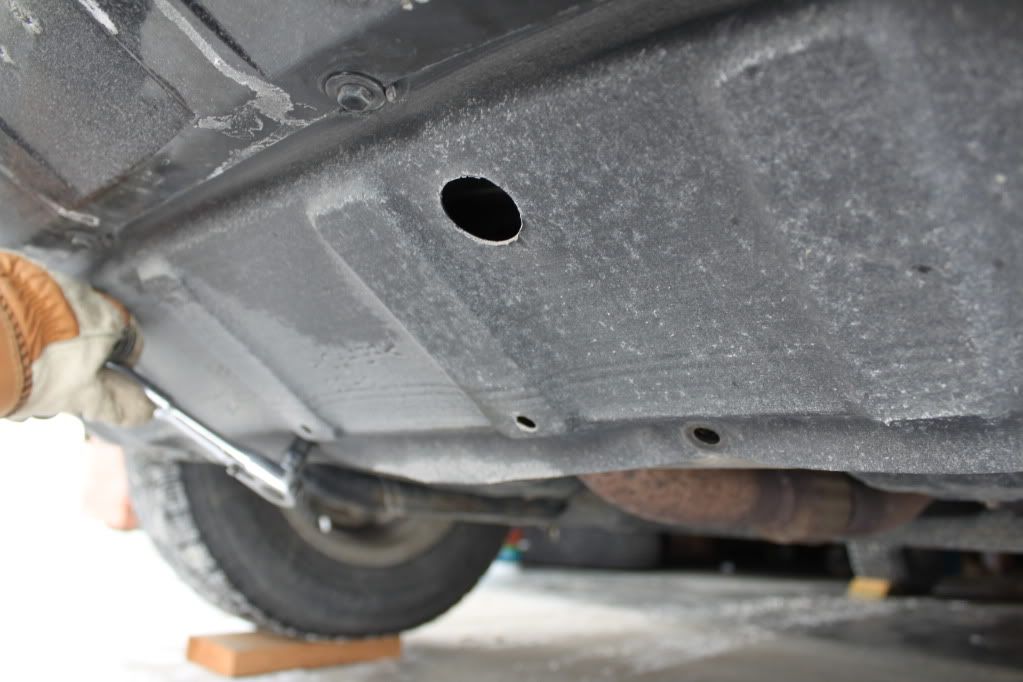
Next we need to get rid of the plastic cowl that is in the way of accessing the oil filter. It is held in place with 8 x 10 mm bolts (4 in the front, 4 in the back). BTW, you can see my passenger front wheel on that Cedar block in this pic:
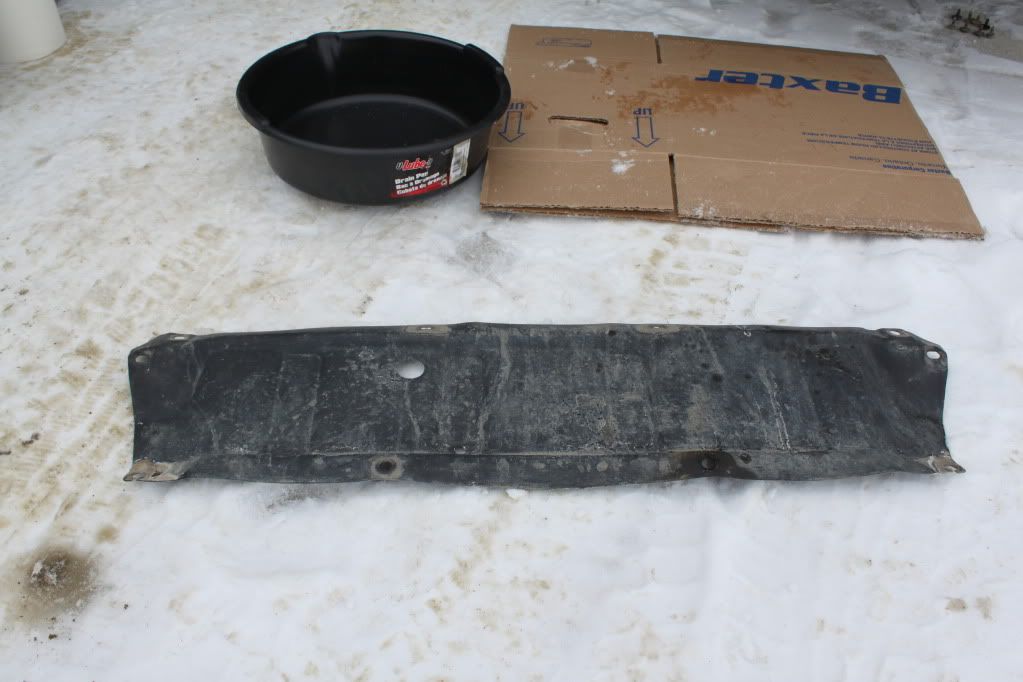
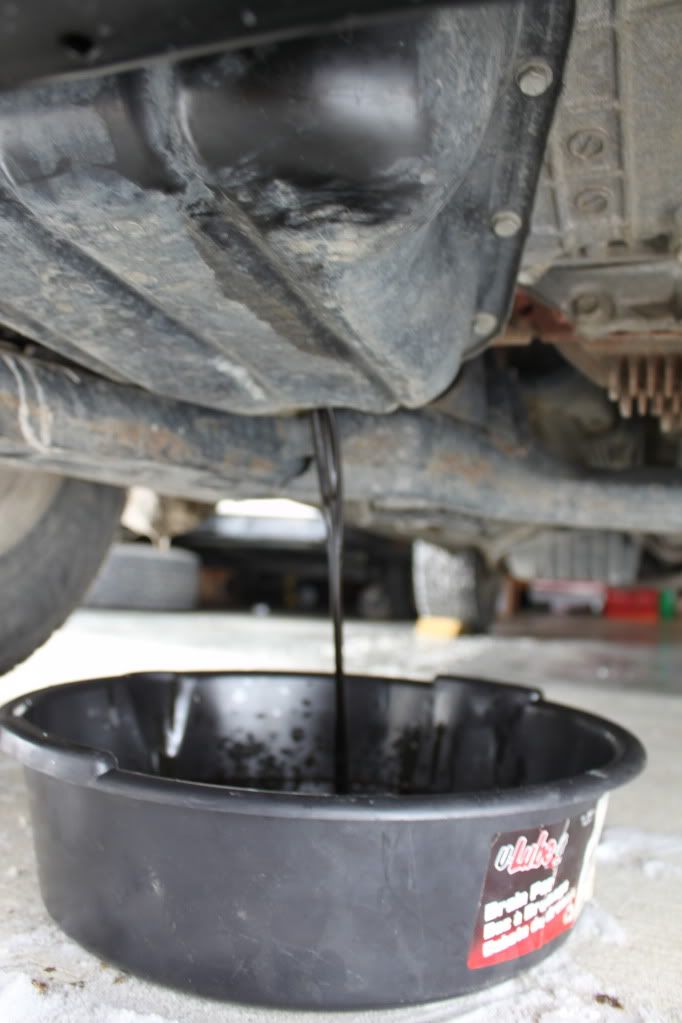
Once it's off, you'll want to find a pan to drain your oil into. The wider the better, as oil tends to change it's arc as it drains... I like the commercial pans b/c they have a nice drain lip which makes it easy to transfer the used oil into my big bucket where I store it until I make a trip to the recyclers. ALWAYS recycle your used oil. One litre of used oil pollutes 100's of thousands of gallons of fresh water.

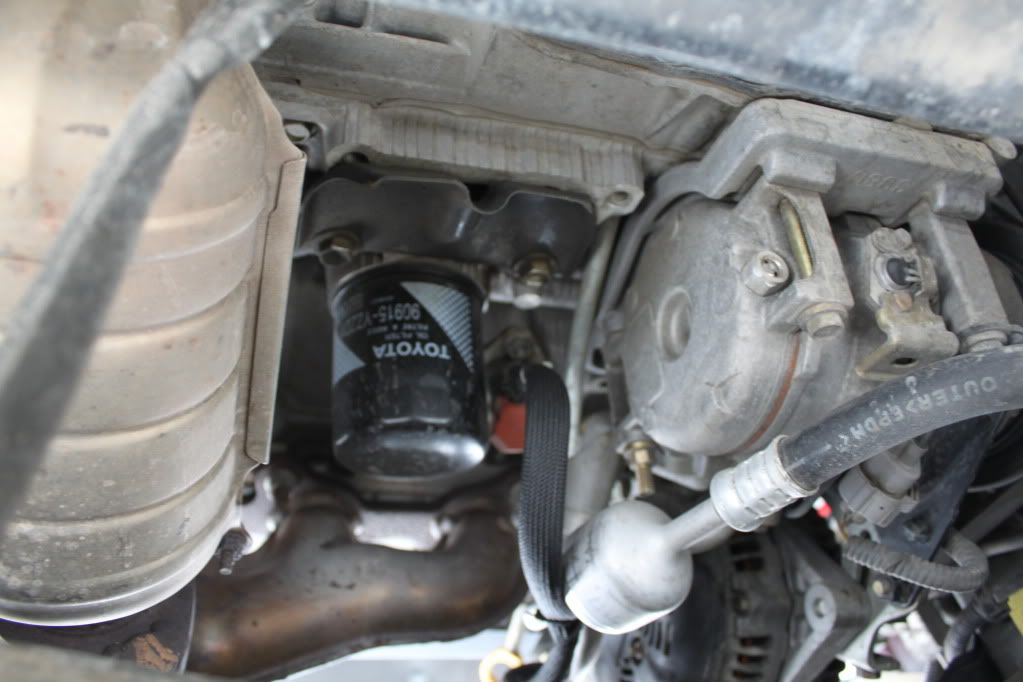
With the cowl off, you will have a nice clear view of the filter. Watch out, one of the (usually HOT) catalytic converters is right beside it - you can get a burn if not wearing gloves.:
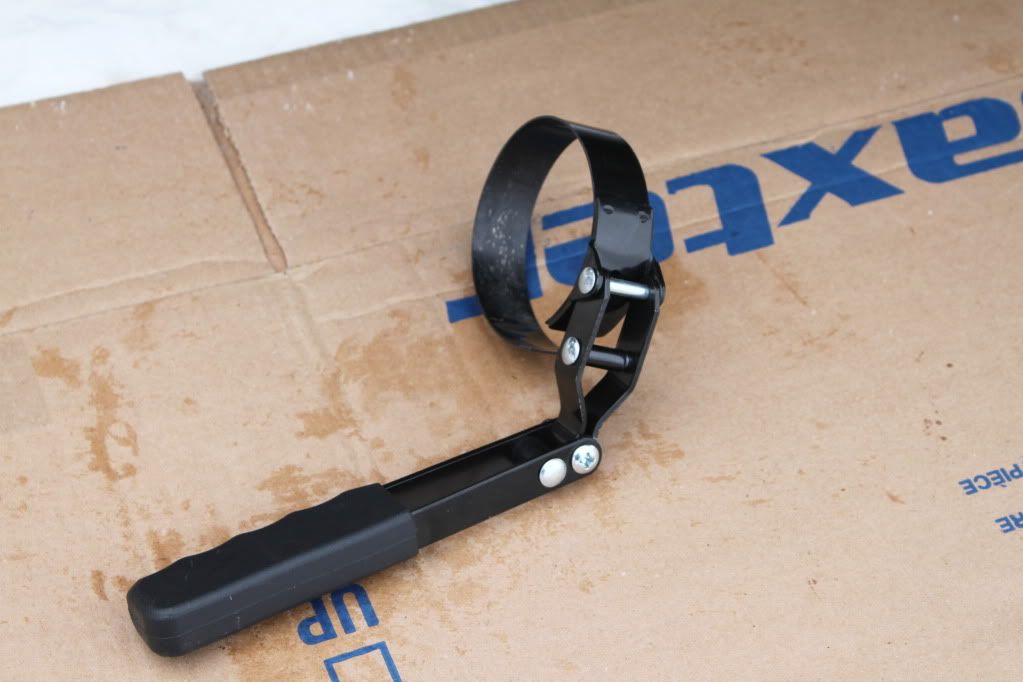
And ideally, you can usually loosen the filter with grippy gloves. If not, this tool - an oil filter wrench - inexpensive at most auto stores - will help. Be sure to get one that articulates like this:
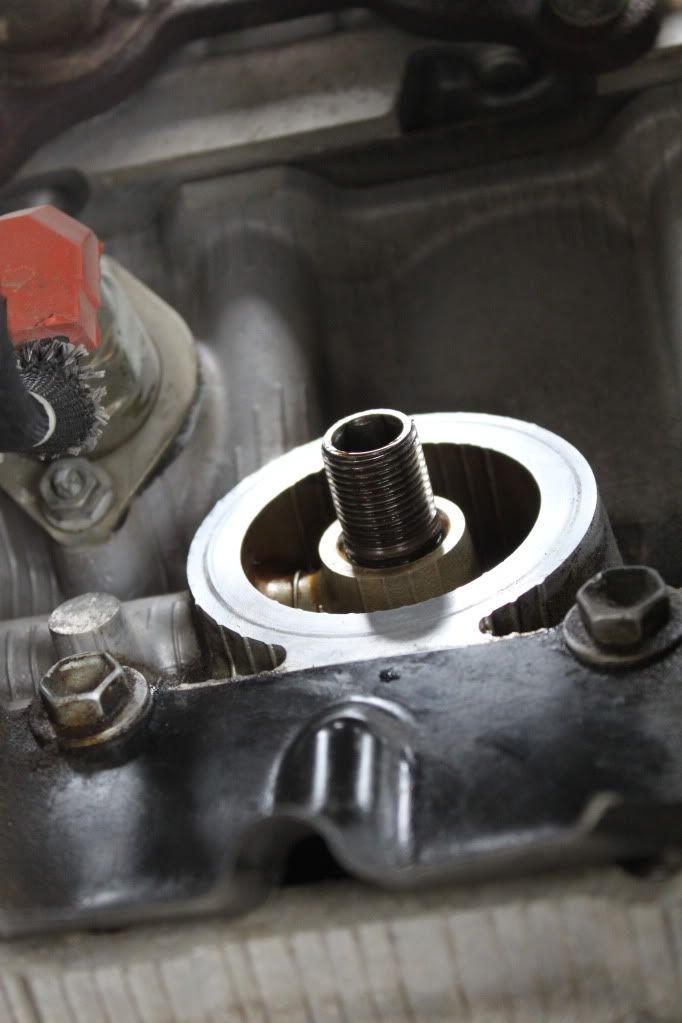
It will take quite a few turns to spin off the old filter. Be prepared to get some oil on your gloves / dripping on the cross-member. There is a little flow-plate designed to (sort of) direct the oil, under the filter, but it works mediocre at best. Some guys use a smaller bucket (like an old margarine container) to try & catch it - I'm not that coordinated to juggle all that. After old filter is removed, clean up the filter seat, & make sure the OLD GASKET is NOT stuck to it. When done, it should look all shiny & clean like this:
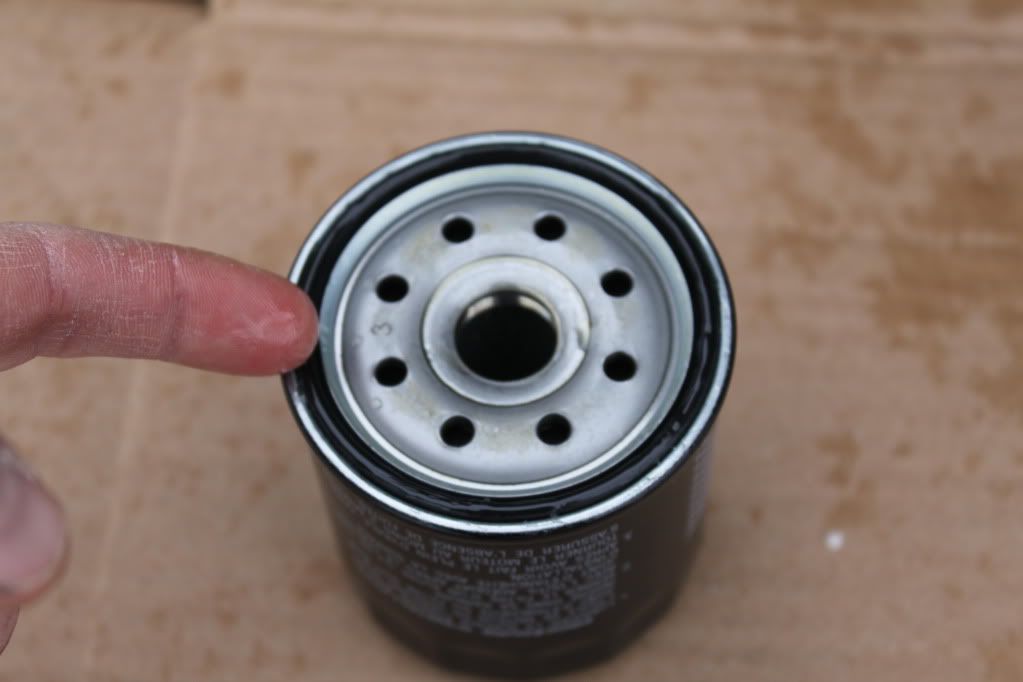
Now get your new filter. If it is a genuine Toyota OEM, you will need to remove the plastic dust wrap covering the opening. Place oil around the filter gasket & a few drops on the threaded part - like this (note I wasn't wearing gloves - bad me!) - it is important to do this, to avoid oil leaks, and I like to oil the threads to make it ++ easy to spin it back on.
Now replace the oil filter. You should easily be able to spin it on with only the force of a couple of fingers. DO NOT use a wrench to turn it down. If it is not turning easily, you are probably cross-threaded. Back up & start again. Turn it until the gasket first makes contact with the engine. Note whatever marking is on the filter body at that point, then turn it 1/2 to 3/4 turns more (imagine where that marking should be at that point, and turn filter till you get there). I can do this by hand with grippy gloves; you can use the strap wrench if you have to, but DO NOT over-tighten. The torque spec is only 13 ft-lbs. Most common mistake is over-tightening these.
Give the area around the filter a wipe with some paper towel ,and now we can move on to the drain plug, Yay!
You will need a 14 mm wrench - a box end works well here. Loosen plug with wrench. It probably will be a little tight. Lefty-loosy, Right tighty

You can finish removing the drain plug with thumb & forefinger. (this is where butyl gloves are *really* a good idea) so that you can snatch it away before the hot oil shoot out. Or you can let it drop into pan, & fish it out later
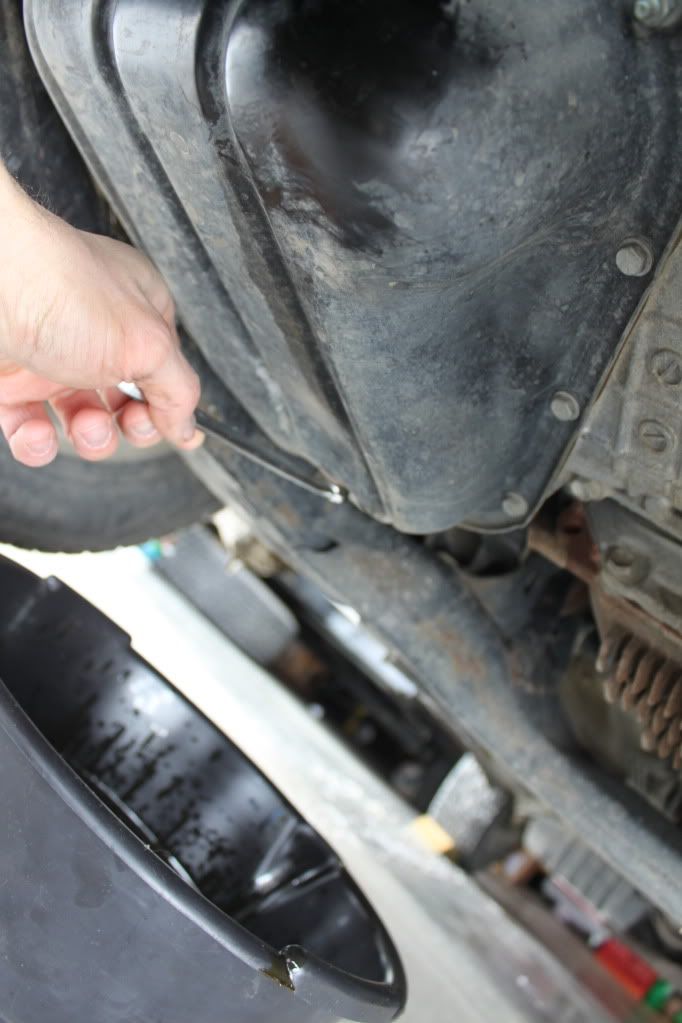
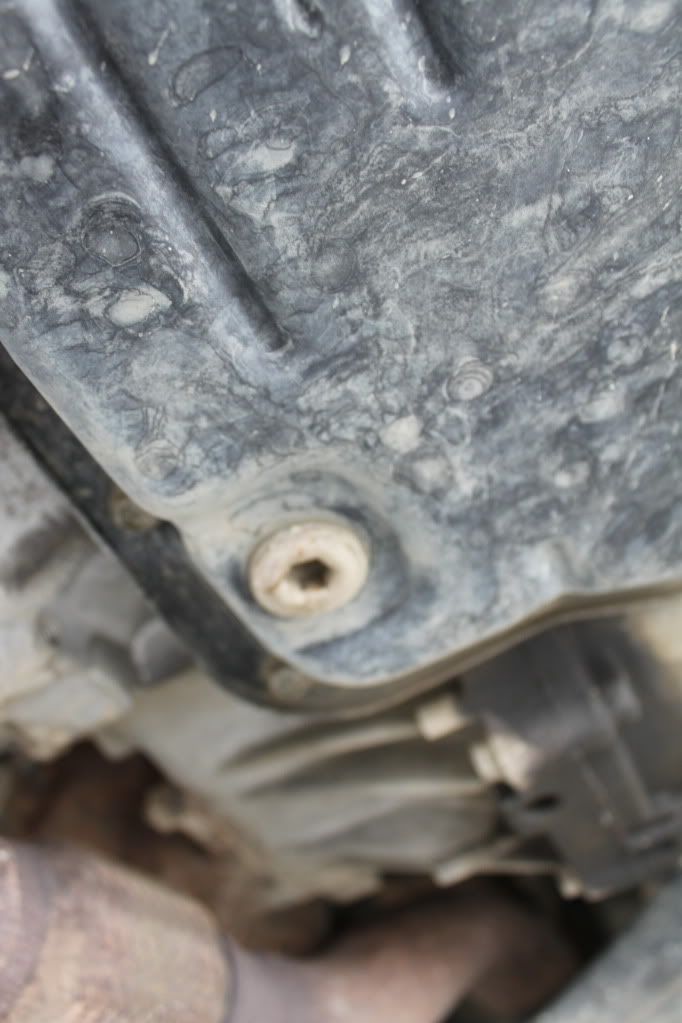
I have to say it (because it has happened) - there are two black plans with plugs on them under the car. One of them is the transmission / front diff. you DONT want to drain this one (the one with the hex-head recessed bolt):
Anyway, while oil is draining, this is a great time to replace that plastic cowl & tighten down the 8 x 10 mm bolts. Just hand tight, not too much or you will squish the plastic. I like to drain until it's only a few drips / min - makes wiping the plug area up easy, and gives me time to check over other things like fluid levels / belts / hoses / tire pressure. An oil change is a great time to spend some quality time with your ride.
Once oil done draining, wipe drain area thoroughly, making sure old washer not stuck there. Replace plug (I always get a new washer at same time I buy filter; if you didn't make sure you have found the old one!) Hand tighten carefully - again, it should be easy to turn by hand - if not, back up & start again, as you don't want to cross-thread an oil pan

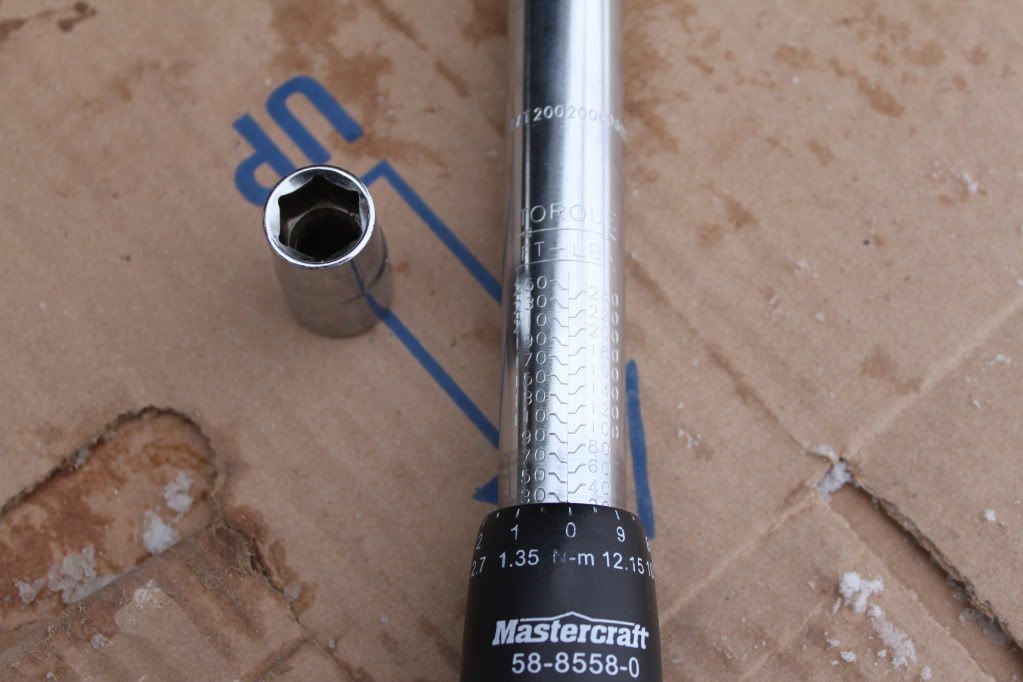
Once hand tight, you can turn it another 1/2 turn with a wrench. However, I prefer to use my torque wrench - I use 30 ft-lbs, but I see another poster references 33 ft-lbs.
Next, fill engine, using funnel (clean it first - oil funnels are dirt magnets) to avoid spilling. Those PP jugs are great, with the 2 handles - not a drop spilled. If using a larger jug, maybe stop after about 4 to 4.5 quarts, turn engine on for about 30 secs, shut off, let settle, and check level.
* TRUST YOUR DIPSTICK* - you DONT want to over-fill an engine - believe it or not, but that is bad as underfilling.
Replace filler cap. Start engine, let run for a minute or two, while inspecting for leaks / oil dripping anywhere. There shouldn't be any at all.
recover all tools (your 10 mm socket & ratchet, 14 mm spanner, oil filter wrench, oil pan, paper towels, etc) Make sure filler cap is back on & dip stick replaced. Close hood.
Enjoy cold bevvie of choice
 , knowing you did a proper oil change, with quality oil & filters (please, please don't buy the cheapest stuff for your baby)
I like to check the oil level after 50 & 200 km in case it needs any topping up & to ensure no problems.
I hope this helps others do this very basic item of maintenance, which is one of the few things still in the purvey of the home mechanic these days.
D
No comments:
Post a Comment